In this Post, we'll walk you through creating a WPF application with CRUD (Create, Read, Update, Delete) and also we will learn how to implement ICommand.
Here i will perform CURD operations on Employee having the properties ID, Name, Age, Gender, and Address. Plus, we'll add buttons to perform these operations seamlessly. Let's get started!
Step 1: Setting Up Your Project
Open Visual Studio: Launch Visual Studio and create a new WPF project.
<Window x:Class="CURD.Views.EmployeeDetails"
xmlns="http://schemas.microsoft.com/winfx/2006/xaml/presentation"
xmlns:x="http://schemas.microsoft.com/winfx/2006/xaml"
xmlns:d="http://schemas.microsoft.com/expression/blend/2008"
xmlns:mc="http://schemas.openxmlformats.org/markup-compatibility/2006"
xmlns:local="clr-namespace:CURD.Views"
mc:Ignorable="d"
Title="EmployeeDetails"
xmlns:sys="clr-namespace:System;assembly=mscorlib">
<Grid >
<Grid.RowDefinitions>
<RowDefinition Height="*"/>
<RowDefinition Height="*"/>
<RowDefinition Height="*"/>
<RowDefinition Height="*"/>
<RowDefinition Height="*"/>
<RowDefinition Height="*"/>
<RowDefinition Height="*"/>
</Grid.RowDefinitions>
<Grid.ColumnDefinitions>
<ColumnDefinition Width="*"/>
<ColumnDefinition Width="*"/>
</Grid.ColumnDefinitions>
<TextBlock Text="ID:" Grid.Row="0" Height="40"/>
<TextBox Text="{Binding EmployeeId, Mode=TwoWay}" Height="40" Width="200" Margin="5" Grid.Column="1" Grid.Row="0"/>
<TextBlock Text="Name:" Margin="5" Grid.Row="1" Height="40"/>
<TextBox Text="{Binding EmployeeName, Mode=TwoWay}" Width="200" Height="40" Margin="5" Grid.Column="1" Grid.Row="1"/>
<TextBlock Text="Age:" Margin="5" Grid.Row="2" Height="40"/>
<TextBox Text="{Binding EmployeeAge, Mode=TwoWay}" Width="200" Margin="5" Height="40" Grid.Column="1" Grid.Row="2"/>
<TextBlock Text="Gender:" Margin="5" Grid.Row="3" Height="40"/>
<TextBox Text="{Binding EmployeeGender, Mode=TwoWay}" Margin="5" Width="200" Height="40" Grid.Column="1" Grid.Row="3"/>
<TextBlock Text="Address:" Margin="5" Grid.Row="4" Height="40"/>
<TextBox Text="{Binding EmployeeAddress, Mode=TwoWay}" Width="200" Margin="5" Height="40" Grid.Column="1" Grid.Row="4"/>
<StackPanel Orientation="Horizontal" HorizontalAlignment="Right" Margin="5" Grid.Column="1" Grid.Row="5" Height="40">
<Button Content="Add Employee" HorizontalAlignment="Left" Width="100" Margin="5" />
<Button Content="Update Employee" HorizontalAlignment="Left" Width="100" Margin="5" />
<Button Content="Delete Employee" HorizontalAlignment="Left" Width="100" Margin="5" />
</StackPanel>
<ListView ItemsSource="{Binding Employees}" SelectedItem="{Binding SelectedEmployee}" Grid.ColumnSpan="2" Grid.Row="6">
<ListView.View>
<GridView>
<GridViewColumn Header="ID" DisplayMemberBinding="{Binding ID}" />
<GridViewColumn Header="Name" DisplayMemberBinding="{Binding Name}" />
<GridViewColumn Header="Age" DisplayMemberBinding="{Binding Age}" />
<GridViewColumn Header="Gender" DisplayMemberBinding="{Binding Gender}" />
<GridViewColumn Header="Address" DisplayMemberBinding="{Binding Address}" />
</GridView>
</ListView.View>
</ListView>
</Grid>
</Window>
Step 2: Install Entityframework NuGet Package
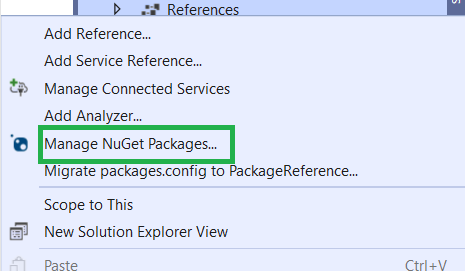
Right click on Project References and select Manage NuGet Package...
Type Entityframework in the Browse tab search box and install it.

Step 3: Define the Employee Model
Create Employee Class: Define an Employee class with properties ID, Name, Age, Gender, and Address.
// Employee.cs
public class Employee
{
public int ID { get; set; }
public string Name { get; set; }
public int Age { get; set; }
public string Gender { get; set; }
public string Address { get; set; }
}
Step 4: Create the EmployeeDbContext
// EmployeeDbContext.cs
using System.Data.Entity;
public class EmployeeDbContext: DbContext
{
public DbSet<Employee> Employees { get; set; }
}
Step 5: Create a class that implement ICommand
// RelayCommand.cs
public class RelayCommand : ICommand
{
private readonly Action<object> _execute;
private readonly Func<object, bool> _canExecute;
public event EventHandler CanExecuteChanged;
public RelayCommand(Action<object> execute, Func<object, bool> canExecute = null)
{
_execute = execute ?? throw new ArgumentNullException(nameof(execute));
_canExecute = canExecute;
}
public bool CanExecute(object parameter)
{
return _canExecute == null || _canExecute(parameter);
}
public void Execute(object parameter)
{
_execute(parameter);
}
public void RaiseCanExecuteChanged()
{
CanExecuteChanged?.Invoke(this, EventArgs.Empty);
}
}
Step 6: Create ViewModel
//EmployeeViewModel .cs
public class EmployeeViewModel : INotifyPropertyChanged
{
private ObservableCollection<Employee> _employees;
private Employee _selectedEmployee;
// Bindable properties for TextBoxes
public int EmployeeId{ get; set; }
public string EmployeeName { get; set; }
public int EmployeeAge { get; set; }
public string EmployeeGender { get; set; }
public string EmployeeAddress { get; set; }
public ObservableCollection<Employee> Employees
{
get { return _employees; }
set
{
_employees = value;
OnPropertyChanged();
}
}
public Employee SelectedEmployee
{
get { return _selectedEmployee; }
set
{
_selectedEmployee = value;
OnPropertyChanged();
}
}
// Commands for CRUD operations
public ICommand AddCommand { get; }
public ICommand UpdateCommand { get; }
public ICommand DeleteCommand { get; }
// Constructor
public EmployeeViewModel()
{
Employees = new ObservableCollection<Employee>();
AddCommand = new RelayCommand(AddEmployee);
UpdateCommand = new RelayCommand(UpdateEmployee, CanUpdateDelete);
DeleteCommand = new RelayCommand(DeleteEmployee, CanUpdateDelete);
}
// CRUD methods
public void LoadEmployees()
{
using (var dbContext = new EmployeeDbContext())
{
Employees.Clear(); // Clear existing items
foreach (var employee in dbContext.Employees)
{
Employees.Add(employee);
}
}
}
private void AddEmployee(object parameter)
{
using (var dbContext = new EmployeeDbContext())
{
var newEmployee = new Employee
{
Name = EmployeeName,
Age = EmployeeAge,
Gender = EmployeeGender,
Address = EmployeeAddress
};
dbContext.Employees.Add(newEmployee);
dbContext.SaveChanges();
Employees.Add(newEmployee);
}
}
//this method will update the employee if ID matches
private void UpdateEmployee(object parameter)
{
//It creates an instance of the AppDbContext to interact with the database.
using (var dbContext = new EmployeeDbContext())
{
//It uses the Find method to locate the employee in the database with the same ID as the EmployeeId
var employeeToUpdate = dbContext.Employees.Find(EmployeeId);
// It checks if an employee with the specified ID exists in the database.
if (employeeToUpdate != null)
{
employeeToUpdate.Name = EmployeeName;
employeeToUpdate.Age = EmployeeAge;
employeeToUpdate.Gender = EmployeeGender;
employeeToUpdate.Address = EmployeeAddress;
//It calls SaveChanges on the dbContext to persist the changes to the database.
dbContext.SaveChanges();
}
}
}
//this method will delete the employee whose ID matches
private void DeleteEmployee(object parameter)
{
using (var dbContext = new EmployeeDbContext())
{
var employeeToDelete = dbContext.Employees.Find(EmployeeId);
if (employeeToDelete != null)
{
//If an employee with the given ID exists, it uses the Remove method of the DbSet to mark the employee for deletion from the database.
dbContext.Employees.Remove(employeeToDelete);
dbContext.SaveChanges();
// It also removes the deleted employee from the Employees collection in your ViewModel. This ensures that the UI reflects the updated list of employees.
Employees.Remove(employeeToDelete);
}
}
}
private bool CanUpdateDelete(object parameter)
{
return SelectedEmployee != null;
}
// INotifyPropertyChanged implementation
public event PropertyChangedEventHandler PropertyChanged;
protected virtual void OnPropertyChanged([CallerMemberName] string propertyName = null)
{
PropertyChanged?.Invoke(this, new PropertyChangedEventArgs(propertyName));
}
}
Step 4: Binding DataContext
In your MainWindow.xaml.cs, set the DataContext of your MainWindow to an instance of the EmployeeViewModel.
public partial class MainWindow : Window
{
public MainWindow()
{
InitializeComponent();
DataContext = new EmployeeViewModel();
}
}
And there you have it, a fully functional WPF application with CRUD operations for managing employee records! 🎉
In this guide, we walked through the process of building a Windows Presentation Foundation application from the ground up. You learned how to define a model for your Employee entity, create a ViewModel to handle the application's logic, set up data binding for a polished user interface, and implement CRUD operations using Entity Framework.
Remember, this is just the beginning. You now have a solid foundation to expand upon. You can enhance the UI further, add validation and error handling, implement search and filtering features, and even explore more advanced topics like data synchronization and multi-threading.
We hope this guide has been a valuable resource on your journey to becoming a proficient WPF developer. If you have any questions or need further assistance, feel free to reach out. Happy coding, and best of luck with your WPF application development endeavors! 💻🚀
Feel free to customize and personalize the ending to match your writing style and the overall tone of your content.


Thank you for your efforts, It is really continuous and tiring work
ReplyDeleteI pray to God to reward you
By the way, I really want to communicate with you, and I am currently following some of your work.
ReplyDeleteI wish you success. Thank you